Black plastic trim fading is one of the most common automotive problems that makes even newer vehicles look aged and neglected. After five years of working as an automotive detailing specialist, I’ve restored countless faded trim pieces and learned which methods deliver lasting results versus quick fixes that fail within weeks.
My name is Sharmin, and I’ve been professionally detailing vehicles since 2020. During this time, I’ve worked on everything from economy cars to luxury vehicles, dealing with various types of plastic trim deterioration. Through hands-on experience with different restoration products and techniques, I’ve developed a systematic approach that consistently delivers showroom-quality results.
The key to successful trim restoration lies in understanding why plastic fades and choosing the right restoration method for each specific situation. This comprehensive guide covers everything from identifying trim types to advanced restoration techniques that provide long-lasting protection.
Understanding Black Plastic Trim Degradation
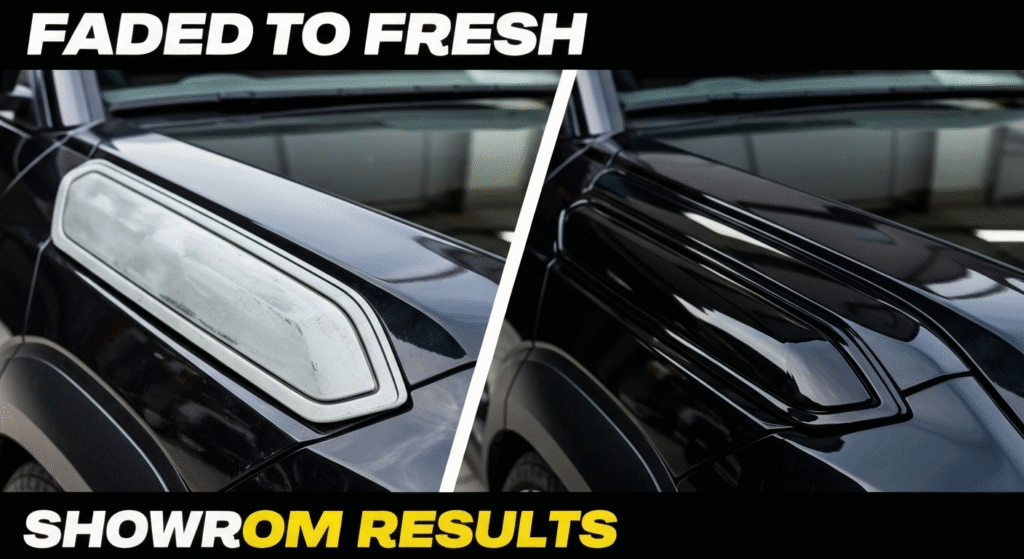
Black plastic trim doesn’t actually fade in the traditional sense. Instead, the surface becomes oxidized and loses its original oils and plasticizers due to UV exposure, heat cycles, and environmental contaminants.
When manufacturers create black plastic trim, they add carbon black pigments and UV stabilizers. Over time, these protective elements break down, causing the surface to appear gray or chalky. The plastic itself remains structurally sound, but the surface layer needs restoration.
Common Types of Automotive Plastic Trim
Different plastic types require specific restoration approaches:
Textured Plastic Trim
- Found on wheel wells, bumpers, and side panels
- More porous surface that absorbs products better
- Easier to restore but may require more frequent treatment
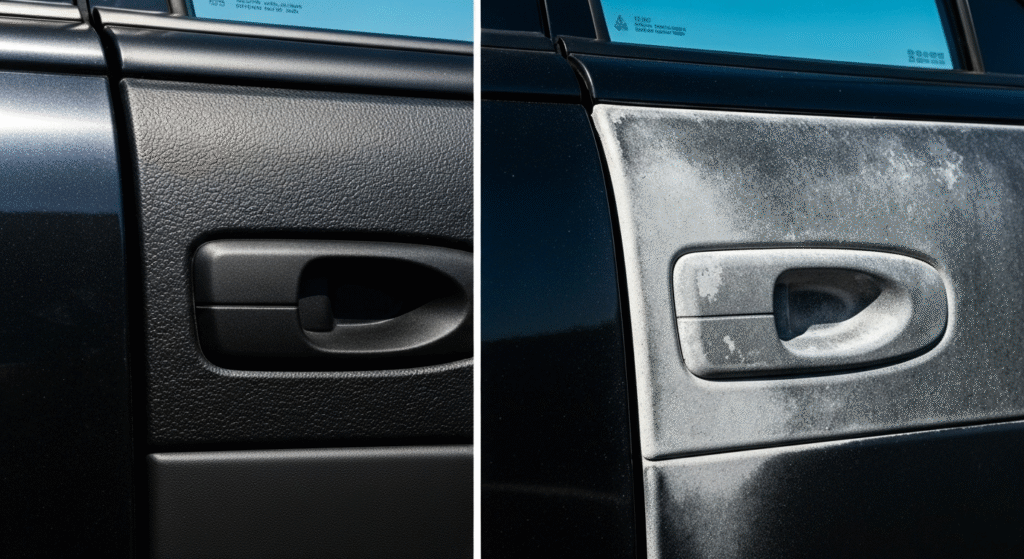
Smooth Plastic Trim
- Common on door handles, mirror housings, and window trim
- Non-porous surface that resists product penetration
- Requires different preparation techniques
Flexible Plastic Components
- Door seals, rubber-plastic hybrid pieces
- Need products that won’t crack with flexing
- Often require specialized flexible coatings
Assessment and Preparation Methods
Before starting any restoration work, proper assessment determines the best approach. I always begin by washing the trim with degreasing soap to remove surface contaminants that might interfere with product adhesion.
Surface Contamination Testing
Run your finger across the trim surface. If it feels smooth but looks faded, you’re dealing with oxidation. If it feels rough or has visible contaminants, additional cleaning steps are necessary.
For heavily contaminated trim, I use a clay bar with detailing spray to remove embedded particles. This step is crucial because restoration products won’t penetrate properly over contaminated surfaces.
Determining Restoration Complexity
| Condition Level | Appearance | Recommended Method |
|---|---|---|
| Light Fading | Slightly gray, smooth surface | Penetrating oil treatment |
| Moderate Fading | Noticeably gray, minor texture changes | Chemical restoration + protection |
| Heavy Fading | Very gray/white, rough texture | Multi-step restoration process |
| Severe Damage | Cracking, flaking, or chalking | Professional refinishing required |
Chemical Restoration Techniques
Chemical restoration involves using products that penetrate the plastic surface to restore oils and provide protection. Based on my experience, this method works best for moderate to heavy fading.
Penetrating Oil Method
This technique uses specialized oils that soak into the plastic structure. I’ve found that products containing silicone oils or mineral spirits provide the most natural-looking results.
The process involves applying the product with a microfiber applicator, allowing 15-20 minutes penetration time, then buffing excess material. The key is using thin, even coats rather than flooding the surface.
Advantages of Oil-Based Restoration:
- Natural appearance
- Long-lasting results when properly applied
- Works on most plastic types
- Relatively inexpensive
Disadvantages:
- Can attract dirt if over-applied
- May require multiple applications for severe fading
- Not suitable for all environmental conditions
Dye-Based Restoration Systems
For severely faded trim, dye-based products provide more dramatic results. These products actually re-color the plastic surface while providing protection.
I typically use this method when oil penetration alone won’t achieve the desired darkness. The application requires careful masking of surrounding areas and multiple thin coats for even coverage.
Mechanical Restoration Approaches
Sometimes chemical methods aren’t sufficient, particularly with heavily textured or severely oxidized trim. Mechanical restoration involves physically removing the oxidized layer.
Light Abrasive Techniques
For moderately faded textured trim, light abrasion with 2000-grit sandpaper can remove surface oxidation. This must be done carefully to avoid damaging the plastic structure.
I use a circular motion with minimal pressure, frequently checking progress. After sanding, the surface needs thorough cleaning before applying restoration products.
Heat Application Method
Heat guns can temporarily restore faded plastic by bringing oils to the surface. However, this method only provides short-term improvement and can damage plastic if overused.
This technique works best as a diagnostic tool to determine if chemical restoration will be effective. If heat application shows significant improvement, chemical restoration will likely succeed.
Professional-Grade Restoration Products
Through testing dozens of products, I’ve identified several categories that consistently deliver results:
Penetrating Restoration Oils
These products soak into plastic pores to restore flexibility and color. Quality products in this category include those with UV inhibitors and antioxidants for long-term protection.
Application involves thorough surface cleaning, product application with microfiber cloth, penetration time, and excess removal. The process may need repeating for optimal results.
Ceramic-Based Coatings
Advanced ceramic coatings provide the longest-lasting protection. These products bond chemically with the plastic surface, creating a protective layer that resists fading.
Ceramic coatings require perfect surface preparation and specific environmental conditions during application. The investment in time and materials pays off with results lasting 2-3 years.
Comparison of Restoration Product Types
| Product Type | Longevity | Application Difficulty | Cost | Best For |
|---|---|---|---|---|
| Penetrating Oils | 6-12 months | Easy | Low | Light to moderate fading |
| Dye Systems | 12-18 months | Moderate | Medium | Heavy fading |
| Ceramic Coatings | 24-36 months | Difficult | High | Long-term protection |
| Temporary Solutions | 2-4 weeks | Very Easy | Very Low | Quick fixes |
Step-by-Step Restoration Process
My proven restoration method involves systematic preparation, application, and protection steps that ensure consistent results.
Initial Preparation Phase
Start with thorough washing using automotive soap to remove loose dirt and grime. Follow with degreasing using isopropyl alcohol on a clean microfiber cloth. This removes any wax, oils, or silicone residues that might interfere with product adhesion.
For contaminated surfaces, clay bar treatment removes embedded particles. Work in small sections with adequate lubrication to avoid scratching the plastic surface.
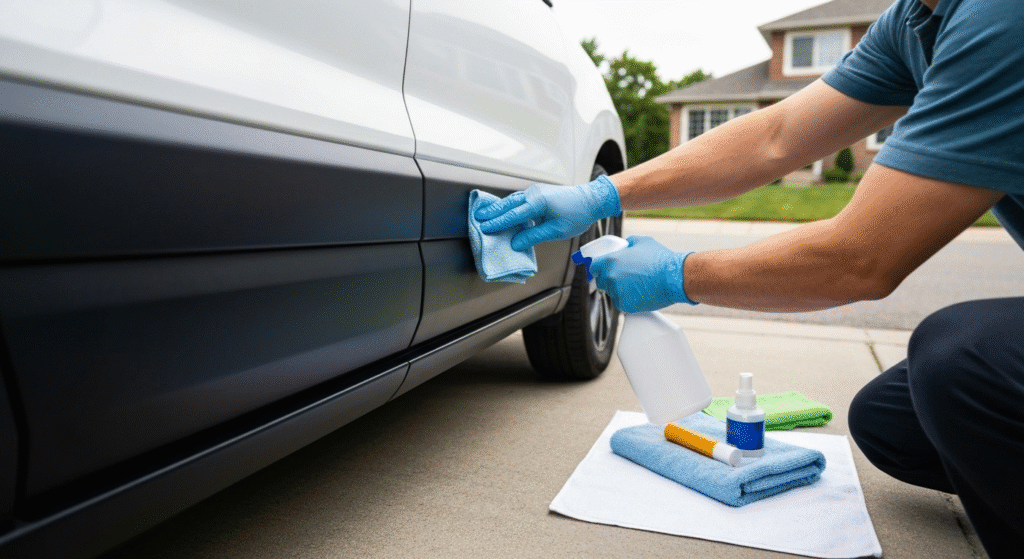
Product Application Technique
Apply restoration products in thin, even coats using clean microfiber applicators. Work in manageable sections to maintain wet edges and ensure uniform coverage.
Allow proper penetration time as specified by manufacturer instructions. Rushing this step reduces effectiveness and may require additional applications later.
Curing and Protection Steps
After initial treatment, allow 24-48 hours for complete curing before applying protective coatings. This waiting period ensures the restoration product has fully penetrated and bonded with the plastic.
Apply UV protection products in thin coats, ensuring complete coverage without over-application. Multiple thin coats provide better protection than single thick applications.
Advanced Restoration Techniques
For challenging restoration situations, advanced techniques can achieve results that standard methods cannot match.
Multi-Stage Chemical Treatment
Severely faded trim often benefits from multiple treatment stages using different product types. Start with aggressive restoration products, then apply gentler maintenance products for ongoing protection.
This approach addresses both immediate restoration needs and long-term protection requirements. The initial investment in time and materials provides superior longevity compared to single-product approaches.
Primer and Paint Systems
When chemical restoration cannot achieve desired results, automotive primer and paint systems provide complete restoration. This method requires significant preparation but delivers permanent results.
Surface preparation involves thorough cleaning, light sanding for adhesion, and proper masking. Apply specialized plastic primer, followed by base coat and clear coat for maximum durability.
Maintenance and Longevity Strategies
Successful trim restoration requires ongoing maintenance to preserve results and prevent rapid re-fading.
Regular Cleaning Protocols
Clean restored trim monthly using pH-neutral car wash soap. Avoid harsh degreasers or all-purpose cleaners that can strip protective coatings.
Use dedicated plastic cleaning products that maintain restoration treatments while removing environmental contaminants. This simple step significantly extends restoration longevity.
UV Protection Maintenance
Reapply UV protection products every 3-6 months depending on environmental exposure. Vehicles in sunny climates require more frequent treatment than those in moderate conditions.
Monitor trim condition regularly and address any fading spots immediately. Early intervention prevents minor issues from becoming major restoration projects.
Environmental Considerations
| Environmental Factor | Impact Level | Recommended Protection Frequency |
|---|---|---|
| High UV Exposure | Severe | Every 3 months |
| Moderate Climate | Medium | Every 6 months |
| Garage Storage | Low | Every 12 months |
| Salt Air Exposure | High | Every 4 months |
Common Restoration Mistakes to Avoid
After years of restoration work, I’ve identified critical mistakes that lead to poor results or premature failure.
Over-Application Problems
Many people assume more product equals better results. Over-application creates sticky surfaces that attract dirt and may leave streaky appearances.
Apply products in thin, even coats and remove excess material promptly. Multiple thin applications provide better results than single heavy coats.
Inadequate Surface Preparation
Skipping proper cleaning and preparation steps virtually guarantees poor results. Contaminated surfaces prevent proper product adhesion and penetration.
Invest time in thorough preparation for long-lasting results. This step determines the success of the entire restoration process.
Wrong Product Selection
Using interior plastic products on exterior trim, or vice versa, leads to rapid failure. Exterior products need UV protection and weather resistance that interior products lack.
Research product specifications carefully and choose items designed for your specific application. Generic products rarely provide optimal results.
Troubleshooting Common Issues
Even with proper technique, restoration projects sometimes encounter problems that need specific solutions.
Streaky or Uneven Appearance
This usually results from uneven application or working in direct sunlight. Remove the product with degreaser and reapply in shade with consistent technique.
Use proper lighting to identify coverage gaps during application. Work systematically to ensure uniform treatment across all surfaces.
Rapid Re-Fading
Quick color loss typically indicates inadequate surface preparation or wrong product selection. Strip existing treatment and start over with proper preparation steps.
Consider environmental factors that might accelerate fading. High-UV locations may require more frequent maintenance or stronger protection products.
Product Compatibility Issues
Mixing different product brands can cause chemical reactions or adhesion problems. Stick with single-brand systems or test compatibility on hidden areas first.
When switching product brands, completely remove previous treatments to prevent interaction problems.
Cost Analysis and Value Considerations
Understanding the true costs of different restoration approaches helps make informed decisions about methods and products.
DIY vs Professional Services
Professional restoration typically costs $150-400 per vehicle, depending on trim condition and location. DIY restoration costs $30-100 in products but requires significant time investment.
Consider your skill level, available time, and desired results when choosing between professional and DIY approaches. Complex restorations may justify professional service costs.
Long-term Value Assessment
| Restoration Method | Initial Cost | Annual Maintenance | 3-Year Total Cost |
|---|---|---|---|
| Basic Oil Treatment | $25 | $15 | $70 |
| Premium Chemical System | $75 | $25 | $150 |
| Professional Service | $250 | $50 | $400 |
| Ceramic Coating | $150 | $10 | $180 |
Frequently Asked Questions
How long does plastic trim restoration typically last? Results vary from 3 months to 3 years depending on the method used, environmental conditions, and maintenance frequency. Chemical restoration with proper UV protection typically lasts 8-12 months under normal conditions.
Can severely faded white or chalky trim be restored to original black? Yes, most faded trim can be restored, though severely damaged pieces may require multiple treatments or professional refinishing. Success depends on the plastic type and extent of UV damage.
Is it safe to use restoration products on all types of plastic trim? Not all products work on every plastic type. Always test products on hidden areas first and use products specifically designed for exterior automotive plastics to avoid damage or poor results.
Why does my restored trim fade again so quickly? Rapid re-fading usually indicates inadequate surface preparation, over-application, or lack of UV protection. Proper preparation and regular maintenance significantly extend restoration longevity.
Conclusion
Restoring faded black plastic trim requires understanding the underlying causes of degradation and selecting appropriate restoration methods based on trim condition and environmental factors. Through my five years of professional experience, I’ve learned that successful restoration depends more on proper preparation and technique than expensive products.
The key to showroom-quality results lies in systematic approach: thorough assessment, proper preparation, appropriate product selection, correct application technique, and consistent maintenance. While chemical restoration works for most situations, severely damaged trim may require mechanical preparation or professional refinishing.
Remember that trim restoration is an ongoing process rather than a one-time fix. Regular maintenance and UV protection significantly extend restoration longevity and keep your vehicle looking its best. With proper technique and quality products, you can achieve professional-level results that restore your vehicle’s appearance and protect your investment for years to come.